Networking Single Sign On SSO with IIS on Windows
February 1, 2024 at 12:48 AMOn this page we will show you how to configure your Windows and Internet Information Server (IIS) environment in order to use NADI with Kerberos SSO.
Get in touch!
Enable Windows Authentication
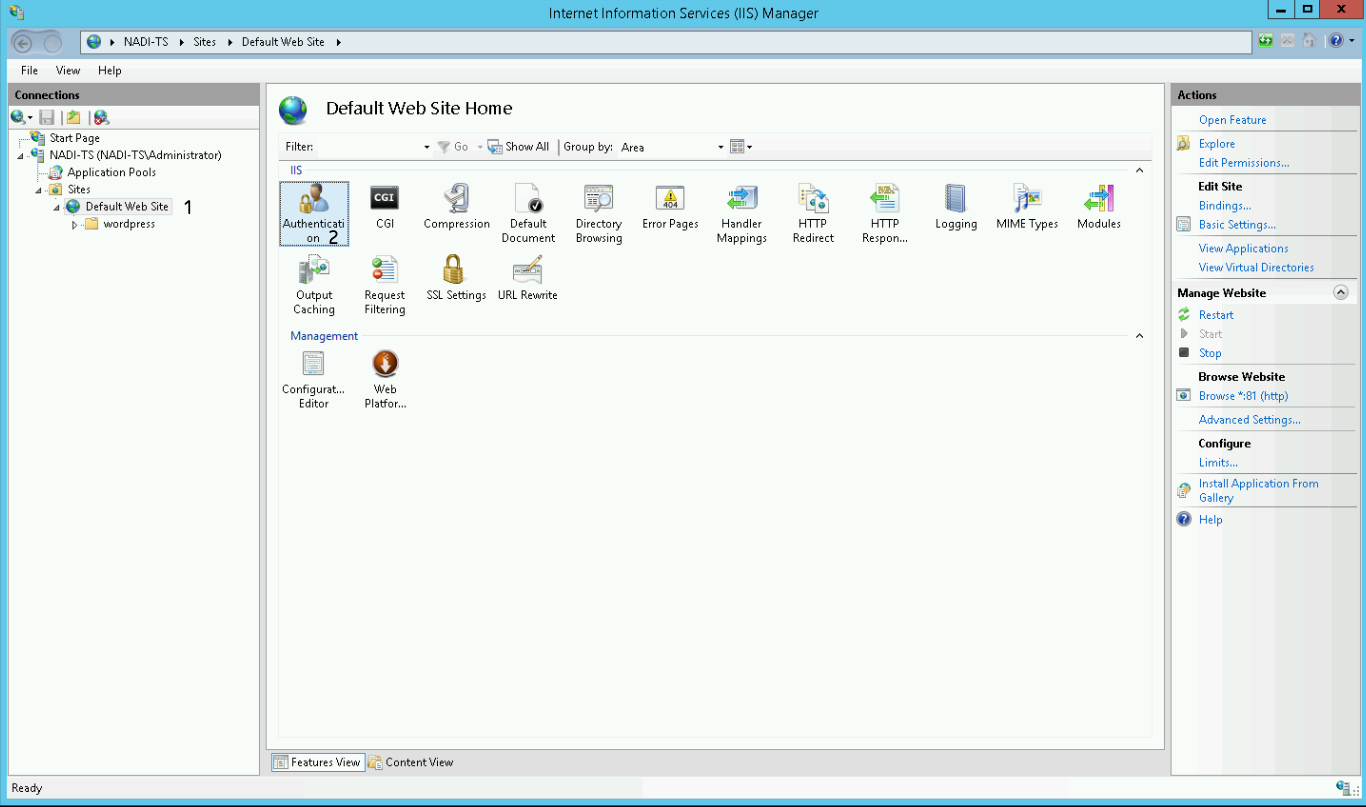
- Open the IIS Manager and select the site under which your WordPress environment runs. In our case we use the Default Web Site.
- Double click on Authentication:
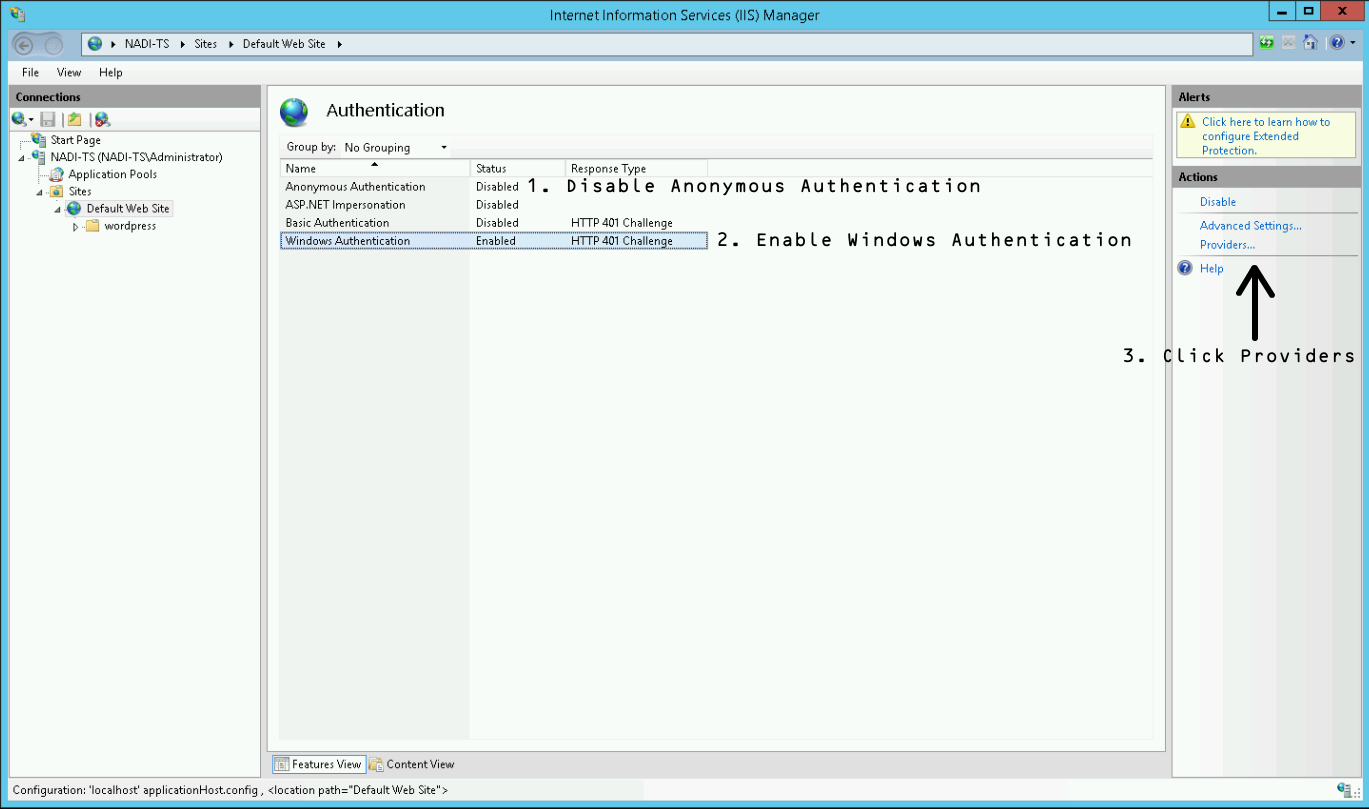
Now you have to configure the authentication settings of your site.
- Disable Anonymous Authentication
- Enable Windows Authentication
- With Windows Authentication selected, click on the Providers link in the right Action panel
You can enable it below Server Roles > Web Server (IIS) > Web Server > Security > Windows Authentication.
In the now appearing window, add the providers as shown in the following screenshot. The order has to be Negotiate over NTLM! Negotiate equals to use Kerberos authentication.
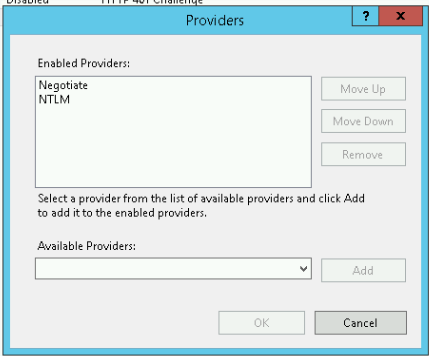
Close the window by pressing OK.
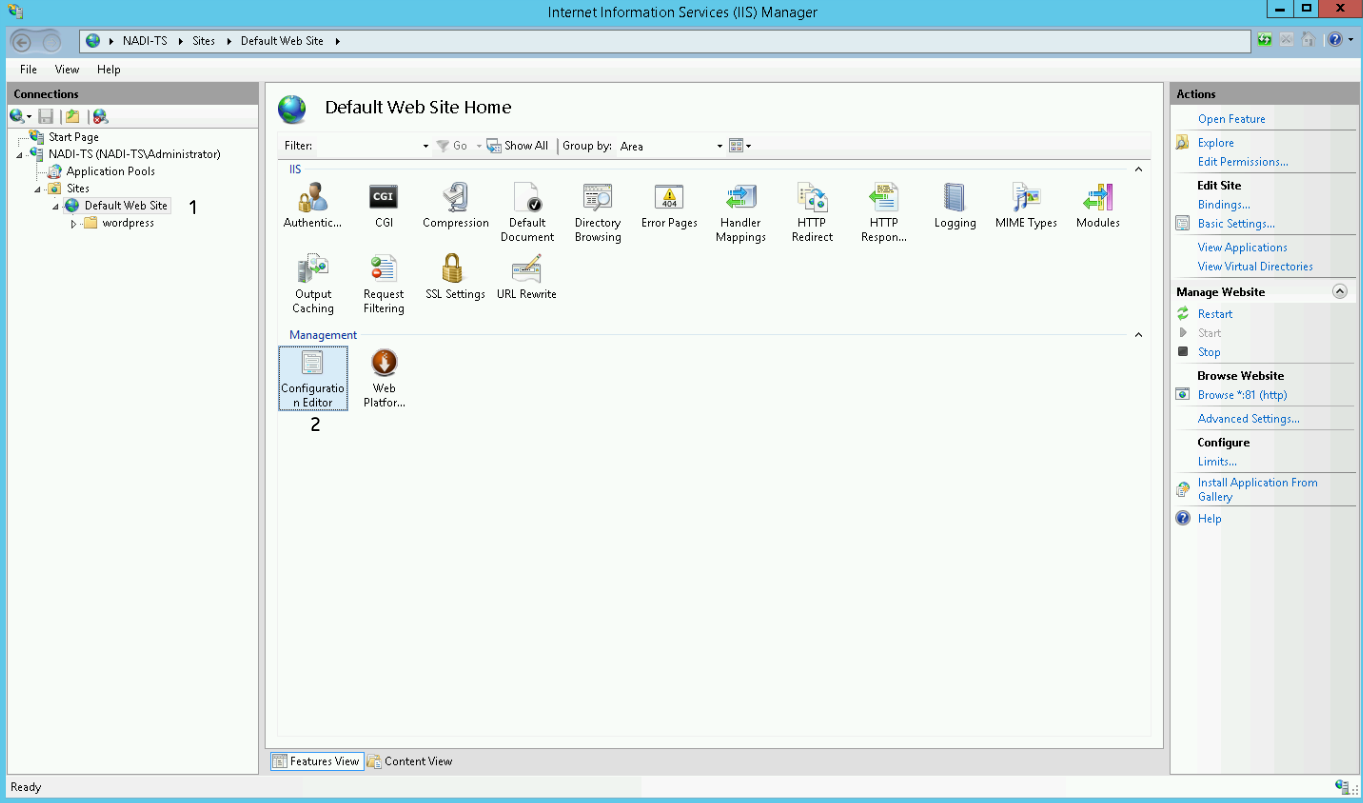
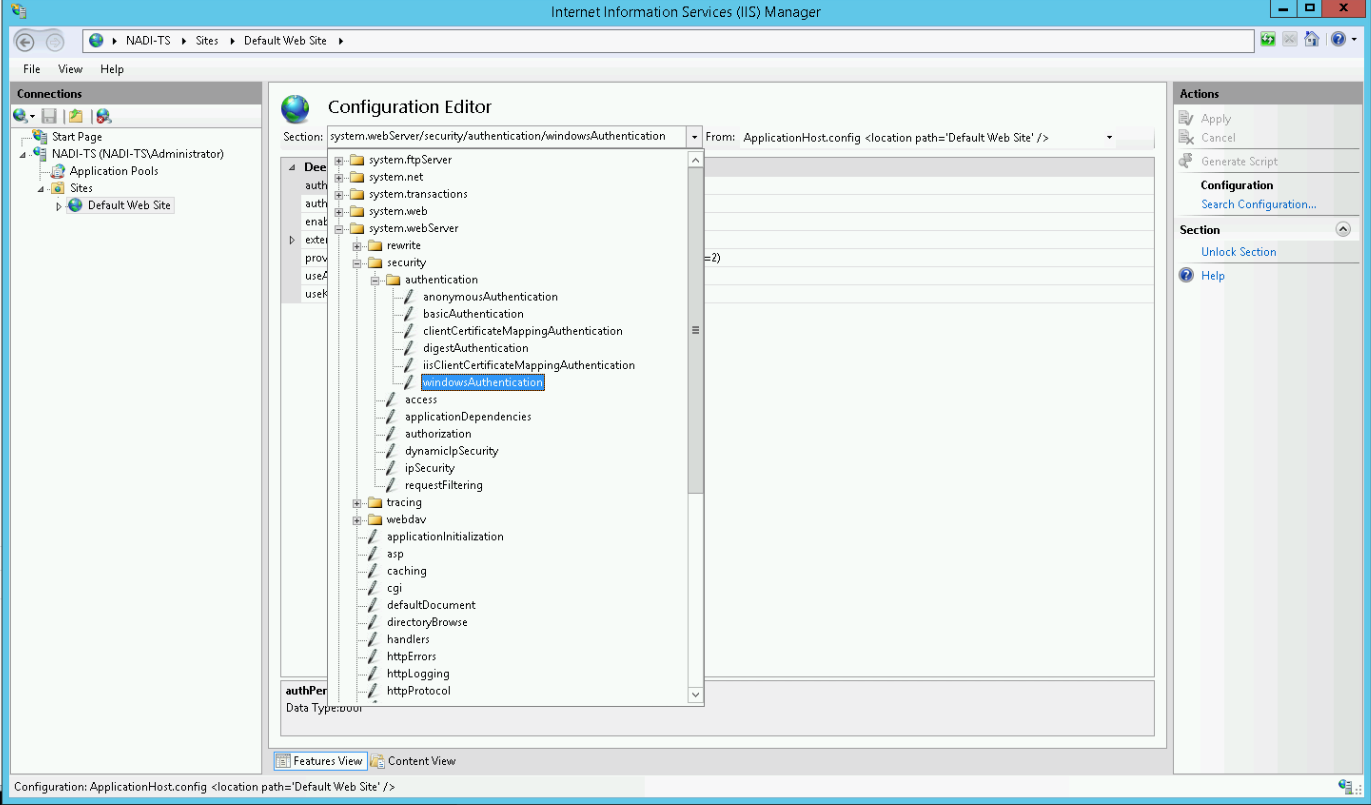
- Select your site on the left panel.
- Double click on Configuration Editor:
Now select windowsAuthentication from the dropdown menu:
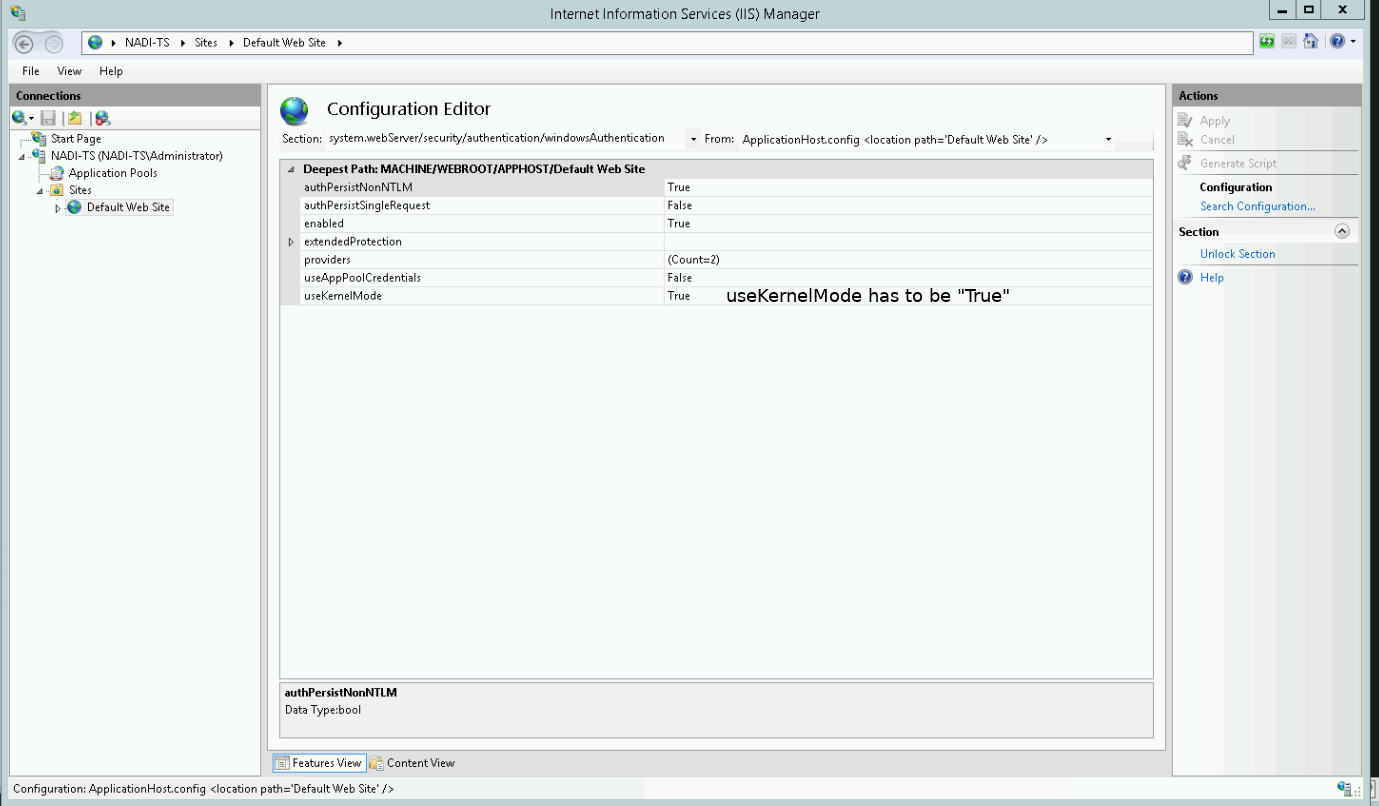
Change useKernelMode to True and save the settings by pressing the Apply button in the upper right corner:
Restart the IIS.
Configure SPNs
In our example we imagine the following scenario:
Host alias (${HOST_ALIAS}) |
Domain | FQDN host (${FQDN_HOST}) |
|---|---|---|
nadi-ts |
test.ad |
nadi-ts.test.ad |
-
Open a console and type in
hostnameto see the name (${MACHINE_NAME}) of your machine.The ${MACHINE_NAME} can be equal to the ${HOST_ALIAS}, but in most cases it isn't. -
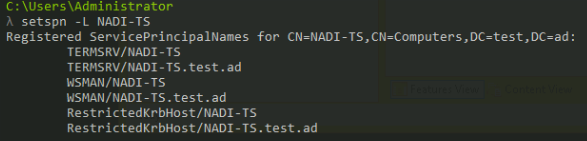
Now type the following to receive a list of all SPNs registered for your machine
setspn -L ${MACHINE_NAME}This should output a list like
-
You now have to add a
HOSTand anhttpSPN for the address of your WordPress environment which has to equal the machines FQDN. To do this type the following commands:setspn -a HOST/${FQDN_HOST} ${MACHINE_NAME} setspn -a http/${FQDN_HOST} ${MACHINE_NAME} -
Check if the SPNs were added successfully by typing
setspn -L ${MACHINE_NAME}

nadi-ts.test.ad:81/wordpress) do not add that port to the SPNs. This is only required for older environments up to Windows 7 and Windows Server 2008.Configure browsers
You have to configure the browsers you are using.
Test authentication
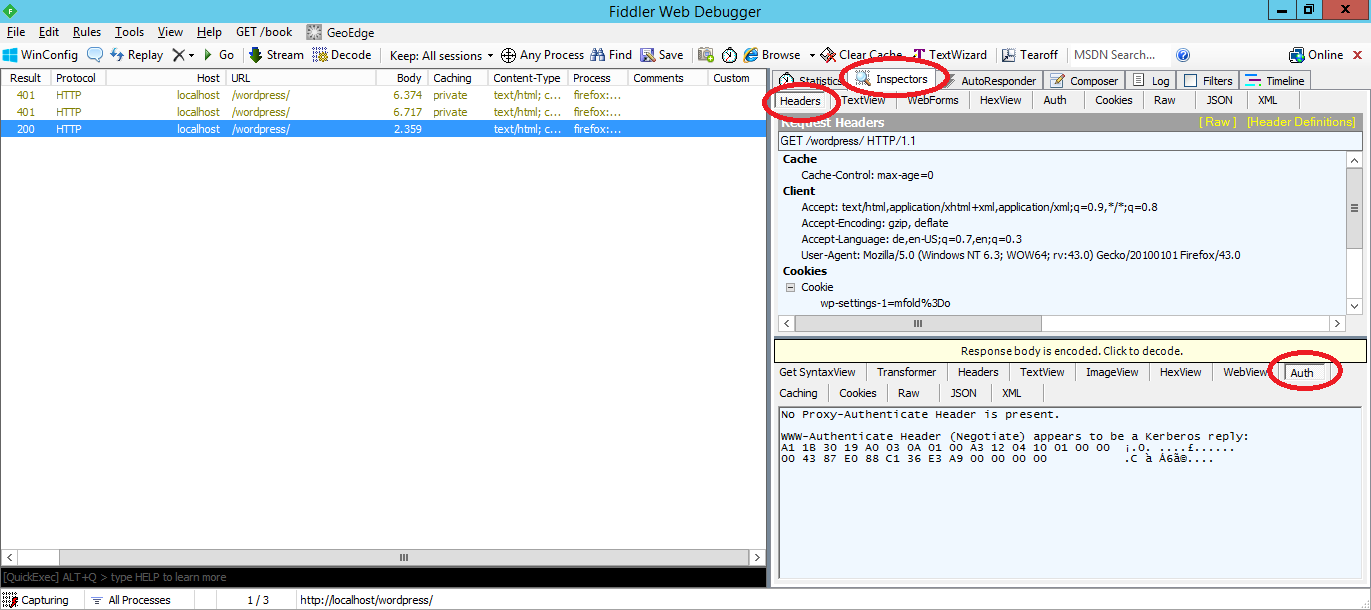
You can use Fiddler to test the Kerberos configuration.
- Start Fiddler
- Open your browser and go your WordPress instance for which have previously enabled Kerberos
- In Fiddler select the last request from the list. In the right panel below Inspectors > Headers > Auth you should see the message
WWW-Authenticate Header (Negotiate) appears to be a Kerberos reply
If you have been successfully logged in into your WordPress environment you should find the following log message in logs/nadi-debug.log:

Get in touch!